


Taming the Managed Solution Beast - How to Update Environment Variables
May 10, 2024
1 min
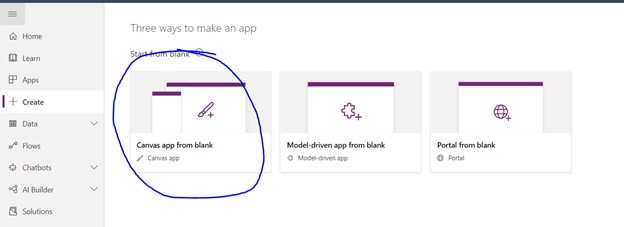
The demo shows how to utilize the Test automation feature of PowerApps to make sure that our Apps are working as expected.
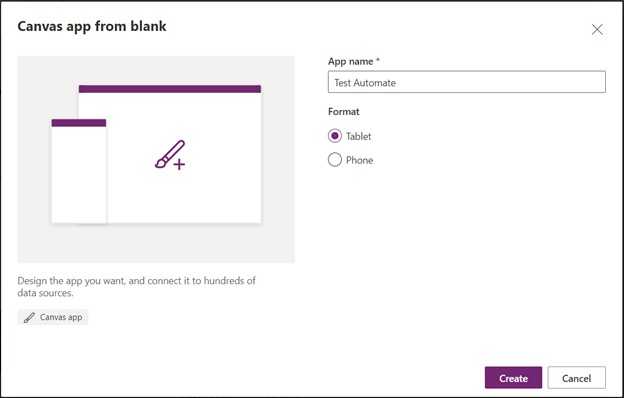
First, let’s create a Blank Canvas App.
Then name our App “Test Automate.”
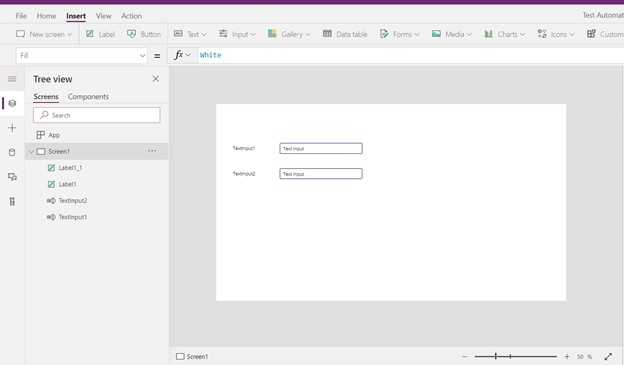
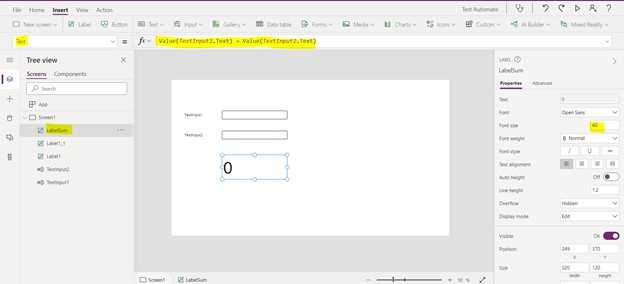
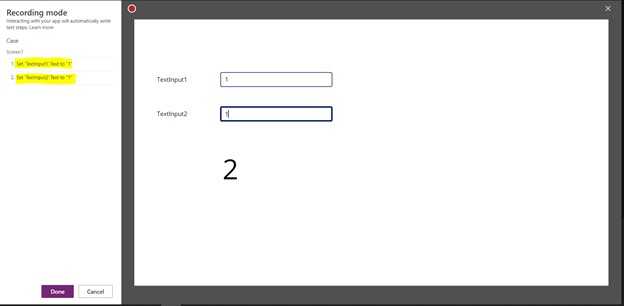
Once the App is built, we will insert two Text Input and two labels on our Canvas.
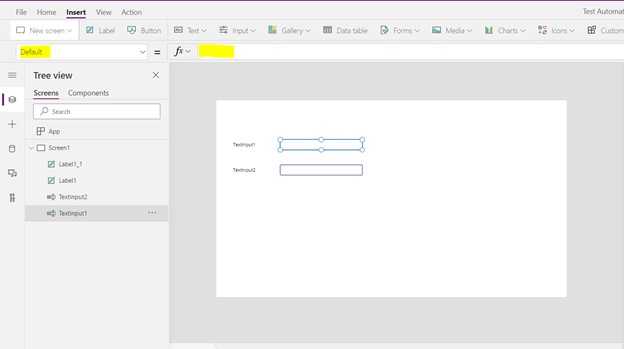
For each Text Input, let’s remove the default value.
We will add another “Label” at the bottom, and we will call it “LabelSum,” let’s also get the sum of both TextInput1 and TextInput2, and we are going to display it on text( we also make the font bigger as well)
Save our change, open the Test Studio by clicking on Advanced Tools, then click on “Open tests.”
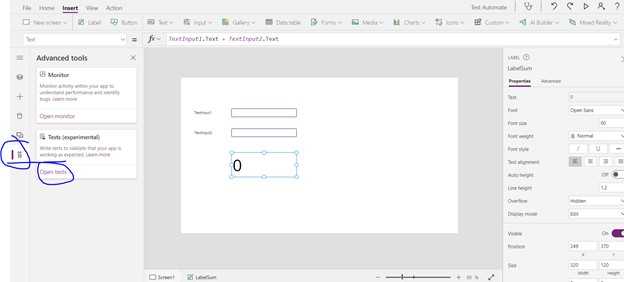
It will now open the “Test Studio” in a new tab.
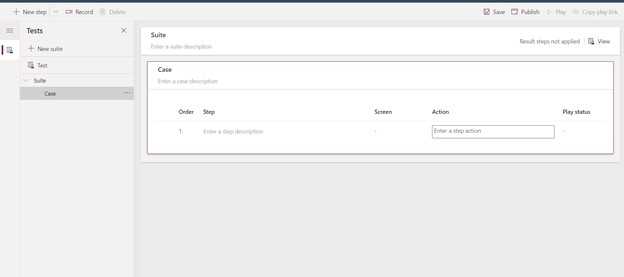
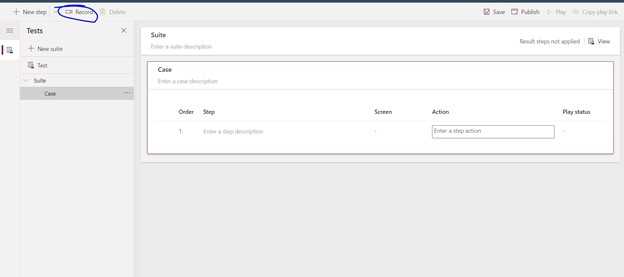
Let now record and try writing Test Cases by clicking on the Record button.
Try adding a value in “TextInput1” and also “Textinput2”, you will notice that it records on the left that each step that we did. Click on “Done”
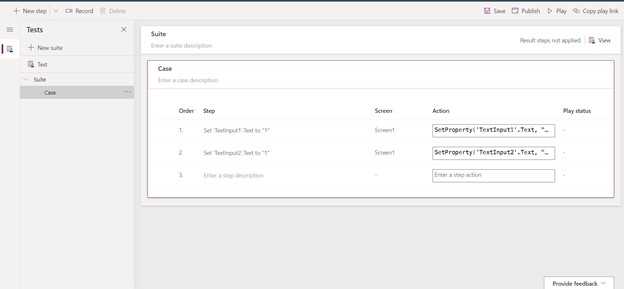
You will redirect to the “Test Studio” with the Test Case filled up through our record.
We will now add a new step called “Assert,” which checks and validates if a given condition returns true. We can do that by clicking on the last step of our test case, then clicking on “Insert step below,” then selecting “Assert.”
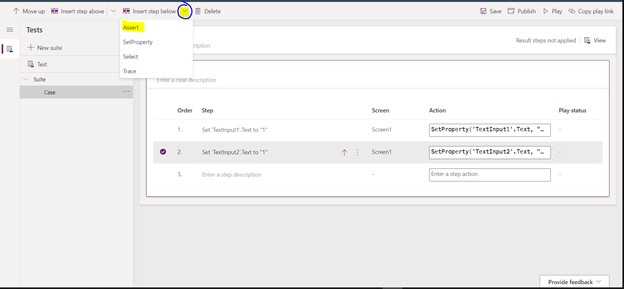
It should add a new step for Assert.

Assert can accept two arguments. The First Arguments is the condition that we wanted to check, and the Second Argument agrees with a string that will be displayed if the first Argument is not true

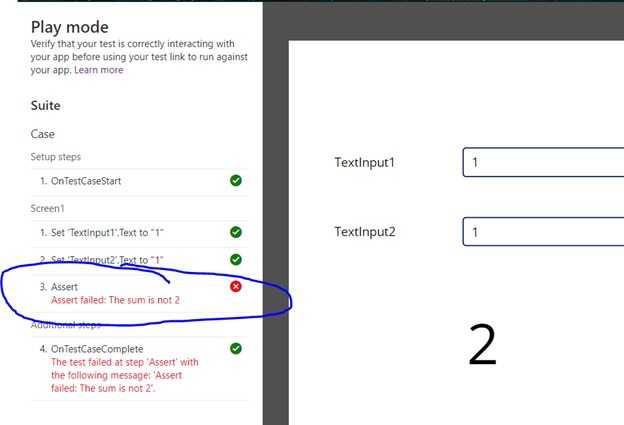
We will now Publish our changes and click on the “Play” button.

Since the condition we set in our set returns true, our error message didn’t show up. Now let us change the value and make sure the Assert will encounter an error.

Now Assert encountered an error because we are trying to find the text “3” to our LabelSum
Testing is a pretty nifty feature to ensure that the App we built is working perfectly through testing. Note that this feature is still on the “Experimental” stage, so I don’t suggest using it on your production projects.


